I’m a NAS newbie. Here’s how I set up my backup solution
I’ve been storing my data in different cloud services and my Mac Mini. It’s all over the place. I bought a small NAS system to set up a clean backup solution – and created my very own cloud.
Just recently, I had to buy 100 gigabytes of storage from Google. My scans of invoices, tax records and warranty receipts had the free cloud bursting at the seams. The 20-franc annual fee is alright. Leitz folders would run me more.
Apple also gets a share of my money: 10 francs per month for two terabytes. iCloud is home to the photos, videos, podcast episodes and backups of the various Apple devices my family owns. In addition, I’ve got a couple of older photo collections split over several external hard drives. Then there are a few films I’d backed up before decluttering my DVDs.
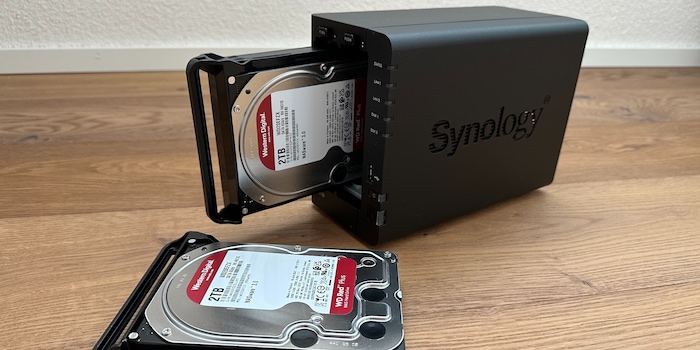
Having my data scattered all over the place annoys me. I want to create order and gain some independence from the US cloud giants. So, I got myself a small NAS system – a beginner’s system from Synology, if you will, with two 2-terabyte hard drives from Western Digital. NAS stands for network-attached storage, or online storage you can use in addition to your laptop or desktop’s hard drive. The NAS is physically located in my home, but I can configure it so that it’s accessible from anywhere over the internet. In other words, it’s my very own cloud.
A NAS offers far more possibilities than just serving as a backup. For example, you can use it as a Plex server to stream movies and series akin to Netflix. But let’s not get ahead of ourselves. First up: setting up the cloud.

This new NAS is meant to replace the over-ten-year-old one I’ve got lying around. Yes, I already own a NAS from Synology. The once-white doodad is blinking away in the corner of my home office in all its yellowish glory. The thing is, I’m not even sure what’s on it any more.
I take the successor out of the box. There’s a power supply, two Ethernet cables, a quick-start guide and the heart of it all: the NAS. My version comes pre-assembled. The two 2.5-inch hard drives with two terabytes each are already installed. Removing the front flap exposes two buttons. If I press them, the lock releases and I can pull the hard drive out of the frame.
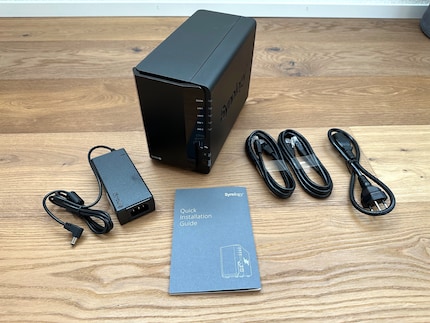
Source: Martin Jungfer
Should I ever decide to upgrade my storage or replace a defective drive, there are only four small screws I’d have to remove. Then it’s as simple as old drive out, new drive in, screw into place. To make sure I don’t accidentally push the frame back into the NAS the wrong way around, there’s even a little «up» marker. It’s idiot proof.
The hardware’s ready to boot, so I skip the hard drive assembly and go straight to step 4 in the instructions, that is, switching the NAS on and installation.
I look around the room for a spot near an Ethernet port and power outlet. Both cables are around 1.5 metres long, which somewhat limits placement. After I get things up and running, I’ll have to move the NAS from my desk. The quiet hum and occasional cooing of the hard drives bothers me. Admittedly, my practically noise-free Mac Mini has spoiled me when it comes to SSDs. If you’re looking for an ultra-quiet NAS solution, you’d be better off with Synology’s J series. As a comparison test done by Computerbase (only available in German) shows, J series hard drives are quieter thanks to better insulation.
Setting things up
I choose the «PC Client» option during installation and type «synologynas.local:5000» into Chrome to get access to the network storage (as a Mac user, «find.synology.com» doesn’t work). This is what I get:
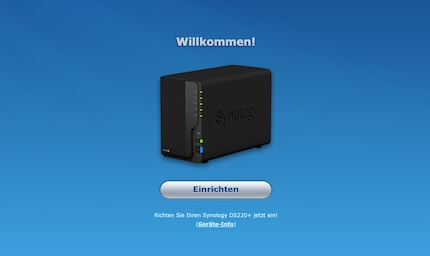
After clicking the set-up button («Einrichten»), there’s nothing further to do for a few minutes. I’m free to sit and watch the circle slowly close as it displays the progress of the installation. To switch things up, three pulsating dots also appear in an attempt to dispel my boredom.
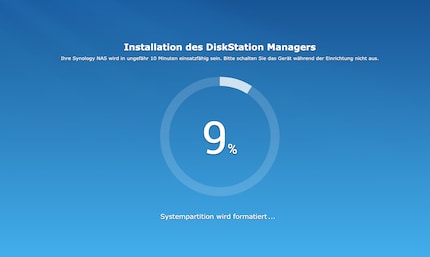
In the next hour, I click through many an installation step I don’t really get. I need to set up volumes and storage pools, and can even add a description to them. Luckily, Synology’s thought of beginners like me and provides understandable explanations at every step. So, I choose one storage pool that spans both disks. And in this storage pool, I set up one volume.
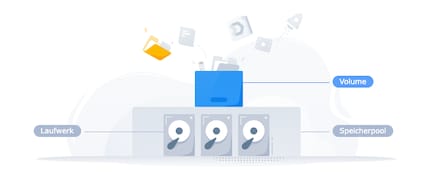
Then I have to decide on a RAID type and a file system. I decide to strictly follow Synology’s suggestions everywhere – in this case, RAID1 and Btrfs. With RAID1, the data is mirrored on both disks. If one fails, all the data is still available on the second disk. The disadvantage is that only half of the total four terabytes of storage can be used.
With the set-up complete, I hope I won’t have to adjust anything anytime soon. For now, I have exactly two goals:
- I want to regularly back up the files on my Mac Mini to the NAS.
- I want to have my own cloud for files that I’d like to be able to access on the go.
Backing up with Time Machine from Apple
I start with the supposedly easy task. Apple offers a backup solution with Time Machine. I haven’t used it yet, because I always store important data in the Google Cloud, while work-related data is in Microsoft’s cloud. Still, I certainly have some files that are only on my Mac Mini, and it’d be a shame to lose them.
That’s why I’ll be backing them up regularly from now on. There’s enough space on the Synology. I start by creating a shared folder which I name «MacMini Time Machine».

In the Synology Control Panel, I need to enable Bonjour Service Discovery under the file services item and check all the sub-options. Otherwise, Time Machine won’t be able to find the network folder. Now, I only found this out after a fair bit of trial and error laced with cursing, consulting forums, cursing again, reading through Synology help pages, and further attempts. The next step, on the other hand, is a breeze. In the Finder, I connect to the folder on the NAS.
My very own cloud
Synology Drive – the equivalent to Google Drive, which I currently use – proves much easier to set up. There’s an app for the iPhone. I log in with my Synology Quickconnect name. The start page and navigation are strongly reminiscent of the Google Drive app. Hey, who said copying from the best had to be a bad thing. Additionally, Synology gives you the option to filter for content by file type, i.e. photos, documents, videos and audio files. This feature’s missing from Google.
On the cloud drive, I find all the files that are in the folder I’d set up and shared in addition to the one meant for backups. And because I also connected it to the Finder on my Mac Mini, I can now easily move files from my desktop to the network folder and have them with me wherever I go – not only on my iPhone, but on any device. In addition to accessing the NAS through the app, I can also do so via web browser using a Quickconnect address.
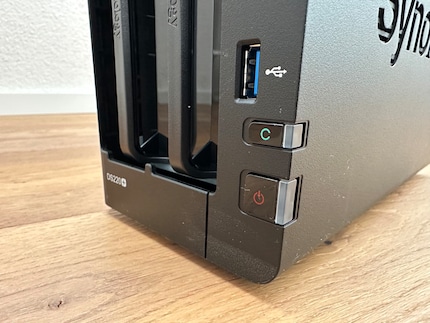
For the reverse case, there’s an equally practical solution. For example, if I have a lot of photos on my camera and want to load them onto the Synology’s disks, I can connect my camera or card reader directly to the NAS via the USB port at the front. After that, I can press the C button on the front of the NAS to copy all the files from the SD card.
Source: Martin Jungfer
My verdict: it’s just the tip of the iceberg
I now remember why I took such a long break from Synology. The software can do just about anything – and as a user I can configure, customise and control it all. In the limited clicking around I’ve done, I’ve discovered that I can create schedules. For example, I could set the device to turn off at night to save power. However, I’ve read that frequently switching HDDs on and off can be detrimental to them. A glance at my Synology’s power consumption puts my eco-minded conscience at ease; the 220+ is one of the most economical NAS systems. According to Computerbase (in German), it only draws 1.8 watts when in hibernation mode, and just under 11 watts when idling and around 16 watts when writing. Depending on usage, your annual consumption can total less than 50 kilowatt hours – an extremely good value.
With the many options in the NAS’s operating system, I have the feeling I’ve only discovered, let alone understood, a small fraction of them, even after several hours. The control panel almost overwhelms me with all its menus, dropdowns and checkboxes.
I’m still hoping to figure out what all the apps in Package Center do and, above all, how they differ. It’ll probably be a while before I cancel my Google and Apple cloud storage subscriptions.
What tips do you have for NAS newbies? How has your experience been? Let me know in the comments!
Header image: Martin Jungfer268 people like this article
Journalist since 1997. Stopovers in Franconia (or the Franken region), Lake Constance, Obwalden, Nidwalden and Zurich. Father since 2014. Expert in editorial organisation and motivation. Focus on sustainability, home office tools, beautiful things for the home, creative toys and sports equipment.
