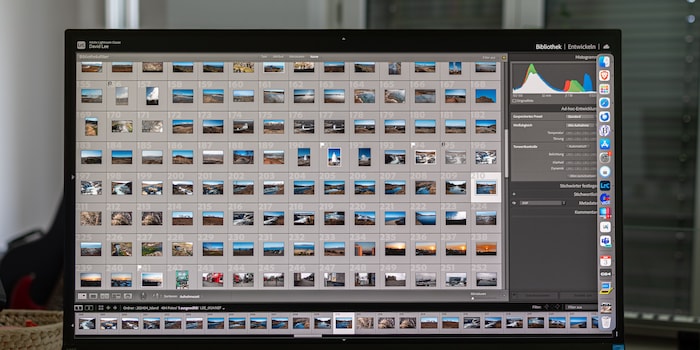
Organise your photos in Lightroom – it’s worth it
We’re all guilty of taking a lot more photos than we need – after all, it’s free. But, it’s better if you make a selection afterwards. With RAW photos it’s non-negotiable. So here are a few tips on how to reduce the load.
You come back from the holidays with hundreds or even thousands of photos, what now? If you’re using Lightroom, you’re probably shooting in RAW and have to edit the photos on your computer. That’s a lot of work. If you sift them out in advance, you can significantly reduce the amount of work involved.
But sorting through them also requires effort. And unfortunately, that’s the most unpleasant part. After a brief initial euphoria when discovering the most beautiful pictures, boredom usually sets in. The photos are saved on a disk and never touched again.
There has to be another way. In this article, I want to help you get through the unpleasant stage as quickly and sensibly as possible.
Two methods: stars or markers
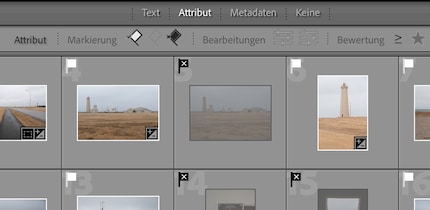
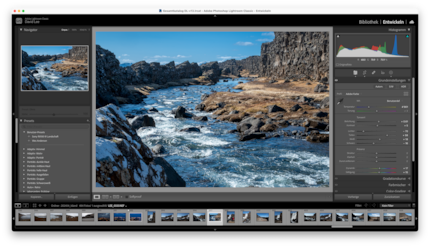
There are two concepts for viewing and rating images in Lightroom – star ratings and markers. In the star ratings, you rate a picture between one and five stars. With the markers, you simply say «yes» or «no» to a photo. The markers are symbolised with small flags, which are either white or black with a cross.
Source: David Lee
Which method you use is up to you. I’d always stick with the same one, so it’s easier to search and filter the images. My fellow editor Samuel is an advocate of stars. I, on the other hand, use markers. The various ratings of the stars overwhelms me and I don’t need it: I just need to know whether I want to keep a shot or not.
The advantage of the markers is that the rejected photos can be removed in one go. The corresponding command is located at the bottom of the «Photo» menu, called «Delete rejected photos». You then decide whether Lightroom should only remove the photos from the catalogue or also remove them from the data storage.
Remember the keyboard shortcuts
To speed up the evaluation process, memorise the keyboard shortcuts. For the stars, simply type a number between 1 and 5, with 0 you delete the rating. For the markers, type the following:
- P for yes (marked)
- X for no (rejected)
- U for unmarked (to delete a marker)
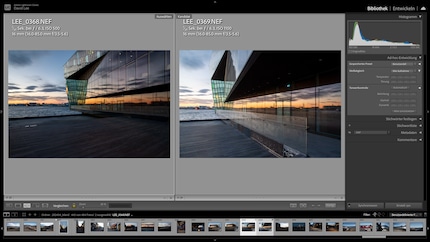
The abbreviations work in both the Library and Develop modules. However, I’d sort out the images in Library mode because you have more viewing options there. You can see the thumbnails in grid view (shortcut G). You can adjust their size at the bottom right. In this view, under «Attribute» you can also choose to only display images with certain markers or star ratings. In addition to Loupe view (E), Compare view (C) is also useful. There you’ll see two images next to each other, which you can also enlarge and move in magnification. Use the lock symbol to determine whether this happens at the same time or independently of each other.
Source: David Lee
First the simple decision
Now you could go through all the pictures in turn and decide for each one whether you want to mark or reject it. But for me, this leads to me skipping at least two out of three photos and thinking: I’ll decide later. Or I mark something and then realise that there are even better, similar pictures, then jump back again and ask myself whether the first one wasn’t best after all.
Above all, however, you’ll quickly become discouraged with a large number of pictures. Decisions cost mental energy, and here you have to make hundreds of decisions. In my experience, there are a few tricks that help:
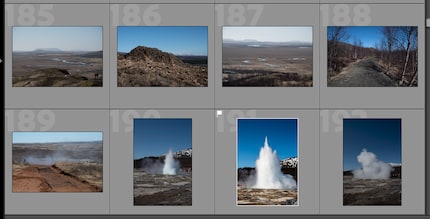
- First just look at the thumbnail. This is the best way to recognise which photos have a clear and interesting composition. If a thumbnail catches your eye, it’s probably a good picture – mark it. For a better assessment, you can make rudimentary edits to selected images in the Library module with just one click. On the right under «Tone control» you’ll find the «Auto» button.
- In close up view, sort out clearly unusable images. It’s easy to decide. If a photo is out of focus or in the wrong place, it’s discarded. Accidentally snapped pictures, portraits with closed eyes and the like can be sorted out just as quickly.
- Now the amount is already much smaller. If you have several pictures of the same motif, decide which one is the best and mark it. Then reject the others. Again, this is also usually not difficult to decide. Comparison view is tailor-made for this step.
Source: David Lee
Get support for tricky decisions
The hardest part is sorting the large number of average photos. They’re not bad, but they’re not really good either. And it’s hard to make a decision. Because even a mediocre photo can have value if it’s associated with memories.
Of course, you can keep every photo to be on the safe side. Just remember, a huge number of photos makes your photo collection slow and confusing. Plus there’s no way of completely avoiding decision-making. Because if you shoot your photos in RAW format, you have to edit the images and export them as JPEGs. And you don’t want to do that for every single photo. Struggling to decide?
It’s worthlooking at it from another angle: how many photos do I want to view in a slideshow, for example? For a one-week holiday, I think around 100 images are about right. I keep adding until I reach this amount. Possible factors you can consider:
- Does the photo remind me of an experience? A story, a special impression, a mood?
- Does the photo show a person or thing important to me?
- Is this the only photo of this type or do I have many more that are similar?
I won’t lie, sifting is and remains laborious. But when you start editing, you’ll realise it’s worth it. You actually come to an end and can complete the project. It’s rewarding. Few, but good pictures also make it more exciting to look at the photos again later. And that’s the purpose of the whole thing.
Source: David Lee
My interest in IT and writing landed me in tech journalism early on (2000). I want to know how we can use technology without being used. Outside of the office, I’m a keen musician who makes up for lacking talent with excessive enthusiasm.