
Apple Lightning USB 3 Kamera-Adapter
Lightning, USB Type C, USB-A, USB Type C, USB-A
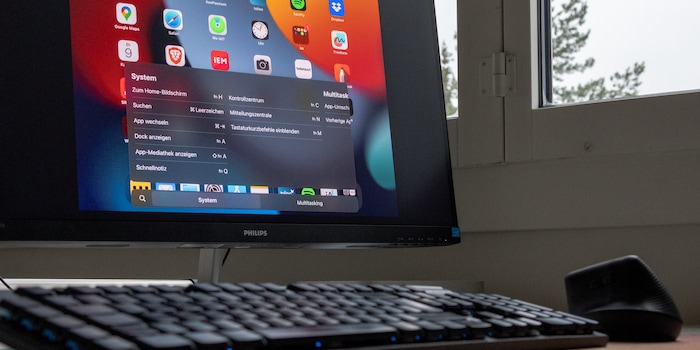
Want to connect peripherals to your iPhone or iPad? Be it wirelessly, via USB-C or Lightning, I’ve tried it all. Here’s how you can do so and what to bear in mind.
Did you know that you can use your smartphone or tablet with a mouse, a keyboard and even a monitor? You can even hook them all up simultaneously. How handy is this in practice? I’ll publish a separate article on that soon. This one’s all about setting things up.
Disclaimer: this article is only meant for iPhone and iPad users. Things work differently on Android and from device to device.
Mind you, the process of connecting external devices to the iPad also differs to that of the iPhone. Whether your device has a Lightning or USB-C port also matters. USB-C makes things easier and better in many ways, but you can generally hook up peripherals over Lightning, too.
You can pair and connect a wireless mouse over Bluetooth just as you would on a computer. Here’s how: open Settings, tap «Bluetooth» and scroll down. Now, put the mouse into pairing mode. (On my mouse, this is done by holding down a button on its underside.) The mouse should now appear under Other Devices. Tap it to connect. From now on, it’ll connect automatically whenever available.
Chances are you’ll still want to use that same mouse on your computer, which is why it’s best to go for a model that supports pairing with multiple devices. Examples are the Logitech MX Master 3A or the Logitech Vertical, which both have a button on their underside for switching between devices.
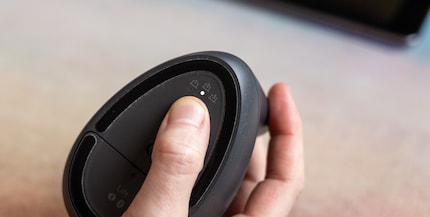
You can also connect a wired mouse to your iPhone or iPad. If your devices all use USB-C, simply plug the mouse in. If your mouse uses USB-A (as many do), you’ll need an adapter.
If your Apple device still has an older Lightning connector, you’ll also need an adapter or a cable with fitting ends. Both are also available for USB-A.
To create an optimal working environment, you should adjust the mouse settings. On the iPhone, you’re actually forced to do so; it’s a part of activating the mouse.
On the iPad, the mouse pointer will appear as a dot as soon as you connect the mouse and will disappear when you disconnect it. In other words, it works with the default settings. Even so, I recommend you open Settings, go to «General» > «Trackpad & Mouse», and adjust the speed of the pointer as well as deactivate Natural Scrolling. If you don’t do the latter, the mouse wheel won’t scroll in the typical direction.
Not so on the iPhone. For the mouse to work, you have to open Settings, go to «Accessibility» and activate «AssistiveTouch». The mouse pointer will now appear as a dot.
In addition to the pointer, a virtual button will appear that opens the AssistiveTouch menu. You can configure it with up to eight functions and move it around the screen.
The annoying thing is that when you disconnect the mouse, the virtual button doesn’t disappear automatically. You can only set it to stay hidden when a mouse is connected. To do this, navigate to «AssistiveTouch» and deactivate «Always Show Menu».
You’re best off creating a shortcut to easily switch AssistiveTouch on and off. That way, you won’t have to go through Settings every time. Here’s how to create a shortcut: in Settings, go to «Accessibility» area and then «Shortcut». Next, add AssistiveTouch as a shortcut. You’ll now be able to switch AssistiveTouch on and off by pressing the side button three times.
In addition, you can add the shortcut to the Control Center via Settings > «Control Centre» > «Accessibility Shortcut» (located under «More Controls»).
As described for the iPad, changing the scrolling direction is also a good idea on the iPhone.
If you want to connect a keyboard, it’s also best to do so via Bluetooth. An example of a keyboard that allows you to switch between several paired devices is the Logitech MX Keys.
Yes, you can also use a wired keyboard, but it can prove even more cumbersome than in the case of a mouse. It’s easy enough with an iPad or iPhone that has a USB-C port; simply plug it in, and it works. Again, if your keyboard uses USB-A, you’ll need a USB-C adapter.
Now comes the complicated part: if your Apple device has a Lightning port, you’ll need a USB adapter to which you can simultaneously connect a power adapter. Otherwise, the device will complain that the keyboard requires too much power – even in the case of a keyboard with no lighting and no battery.

Apple Lightning USB 3 Kamera-Adapter
Lightning, USB Type C, USB-A, USB Type C, USB-A
If you want to be on the safe side, buy the original adapter from Apple (even though it’s expensive). Not every power adapter will work – it needs to provide at least 20 watts.
The good news is if an adapter works with one keyboard, it’ll work with any keyboard. Here’s an extreme use example: an 80s keyboard paired with the iPhone. This isn’t a USB keyboard, so you need an additional adapter for it.
You’ll be able to type text right away, without having to configure anything. But chances are you’ll want to use the keyboard not only for writing, but also for hotkeys, in which case I recommend having a look at the settings.
If you’re using a Windows keyboard, familiarise yourself with its special keys. The equivalent of the Ctrl key in the Apple universe is the Command key (cmd). On a Windows keyboard, cmd will be mapped to the Windows key by default. In other words, to use the shortcut Ctrl + Z, you’ll actually have to press Windows + Z. If you don’t like this, you can reassign the special keys under «General» > «Keyboard» > «Hardware Keyboard». This is where you can map cmd to the Ctrl key, for instance.
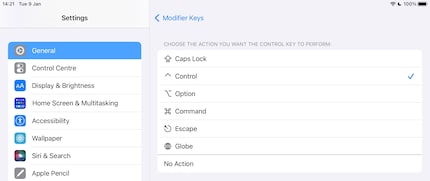
A problem with many Windows keyboards is that they’re missing the Fn key. This cannot be assigned globally to another special button. Some commands on iPhone and iPad rely on Fn. For example, you can show and hide the dock on the iPad with Fn + A.
What you can do is this: in Settings > «Accessibility» > «Keyboards» > «Full Keyboard Access» > «Commands» assign Fn to the Alt key (or another key). Important: you’ll have to do this for each individual command. And there’s another problem.
The commands that you can define yourself are part of the Full Keyboard Access feature, which goes far beyond what I’ve described so far. Full Keyboard Access is a comprehensive control system that goes far beyond mere keyboard shortcuts. You can use it to navigate entirely without a mouse.
When activated, your device will be very different to operate. I’m not a fan. Full Keyboard Access often gets in my way, especially when I’m trying to write. For example, I’ll accidentally trigger a command when I just want to type something.
As the iPad has a 4:3 aspect ratio, you’ll have black bars on the sides of any 16:9 display you hook it up to. The iPhone, on the other hand, has an aspect ratio of around 20:9, meaning you’ll have black bars at the top and bottom of the display. In portrait mode, you’ll have huge black areas on the left and right.
In general, the image on the display will also rotate when you turn the iPad or iPhone by 90 degrees. With the iPhone, keep in mind that landscape mode often isn’t an option, for example on the home screen or in the settings. I’d love to have an external monitor that can be rotated, too; mine can’t be.
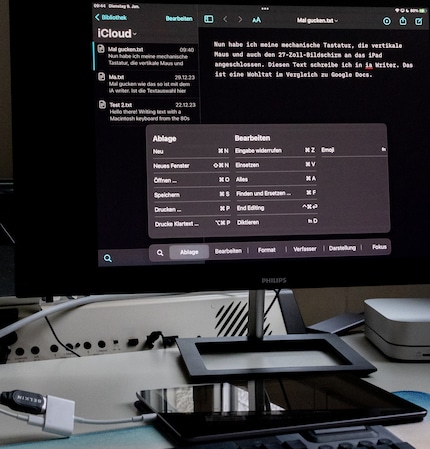
If your iPhone or iPad has a USB-C port, you can connect the display via USB – provided it supports image signal transmission via USB, which isn’t at all a given.
Otherwise, you’ll need an HDMI adapter. There’s one from Apple, but it’s expensive and doesn’t include any cables. Alternatively, you can use the Samsung Dex adapter, which has all the necessary parts. I haven’t tested it myself, but in the video below you can see it in action.
If your iPhone or iPad has a Lightning port, you will, of course, also need an adapter. Again, cheap alternatives are unlikely to work. I recommend going for the expensive original adapter from Apple.
I’ve tested it and it works, but the quality of the image output is disappointing. According to Apple, the adapter transmits «up to» 1080p. With a 4:3 aspect ratio, that comes out to 1,440 × 1,080 pixels. But it’s not the low resolution that bothers me the most; rather, it’s the fact that artefacts – like ghost edges. In a nutshell, it looks as if the data is being sent to the monitor in a highly compressed form.
Time to put it all together. If you have an iPhone or iPad with a Lightning port, you’re best off connecting the mouse and keyboard over Bluetooth. That leaves the Lightning port free for the external display.
If you want to connect multiple wired devices, you’ll need a USB hub. The bad news: this is likely to prove difficult over Lightning. I tried and tried and couldn’t get it to work. If you want to give it a go regardless, make sure your hub has its own power supply; Lightning is only capable of supplying a single with sufficient power. But even then, chances are it won’t work.
If your iPhone or iPad has USB-C, it’s more likely that a hub will work. But I can’t guarantee it either. The keyboard and mouse have worked with every hub I’ve tried, but the display and internet haven’t. A dock that worked consistently for me with the iPhone 15, internet and all, is the HP Dock G5, which is actually intended for notebooks.
Having a separate power supply is also strongly recommended with USB-C. You may find that your hub works without it, but the battery of the iPhone or iPad will drain quickly.
Using a hub, you can kill several birds with one stone. For one, you spare yourself the hassle of USB-A adapters. In addition, it allows you to also connect an SSD. Finally, your iPhone or iPad is connected to the power and, ideally, also wired internet.
As for how (im)practical it is to work in iOS with external devices, I’ll be covering that in a follow-up article.
Header image: David LeeMy interest in IT and writing landed me in tech journalism early on (2000). I want to know how we can use technology without being used. Outside of the office, I’m a keen musician who makes up for lacking talent with excessive enthusiasm.